Showing posts with label side dish. Show all posts

Wednesday, March 6, 2013

Cauliflower and Herb Barley Salad

My big announcement, circa Little E at 6 weeks old: I managed to cook something! I managed to cook something!!! (Perhaps you were thinking that E rolled over or started reciting Shakespeare--sorry to disappoint you, but we aim low in this household.)

Up until a few days ago, Kevin and I were subsisting on the kindness and efforts of my sister and both our mothers.  We have a freezer filled to the brim with food that has lasted for weeks. It has been a godsend, and I don't know how to thank them properly (as usual).

I've also discovered the joy of Trader Joe's prepared food. I know I'm seriously behind the curve here, but their pre-cut and pre-washed bags of greens, like swiss chard and kale, save so much time. As do their artichoke ravioli and pesto sauce. Did you know this?  Of course you did.  I don't care that these things cost almost twice as much as if I prepared them myself, I just don't give a damn.

Still, at some point I had to start cooking again. Oh haha you think it's because of some joy or love of cooking that couldn't keep me away...hahaha no it's more because our freezer stash is running out.

These days I am engaging in some very serious and scholarly reading, namely in the form of magazines, including Bon Appetit. They have a great feature dedicated to fast and fresh dishes.  This warm cauliflower and herbed barley salad is right up our alley.  I served it as a side to the aforementioned artichoke ravioli, but it can be a light meal on its own.

Ingredients

  • 1/2 cup pearled barley
  • Kosher salt
  • 1 tablespoon finely grated lemon zest
  • 3 tablespoons fresh lemon juice
  • 1 tablespoon mayonnaise
  • 1 teaspoon Dijon mustard
  • 6 tablespoons olive oil, divided
  • Freshly ground black pepper
  • 1 head cauliflower, cut into florets
  • 1 15-ounce can gigante, corona, or butter beans, rinsed (I used butter beans because my sister happened to find them at Trader Joe's (or was it Whole Foods), but you can use cannellini or garbanzo beans, I don't think you need to kill yourself trying to find these more unusual beans)
  • 1/2 cup flat-leaf parsley leaves
  • 2 tablespoons fresh tarragon leaves (if you want to simplify your life, just use parsley--I now have a bunch of tarragon that will probably go to waste)


  • Place barley in small or medium saucepan with enough water to cover by 2 inches.  I threw in a couple of chicken bouillon cubes to enhance the flavor (or you could just chicken broth).  Season with salt (unless you're using a salted cooking liquid/bouillon cubes). Bring to boil, lower to gentle boil, and cook until barley is tender---the recipe said 25-30 minutes, but mine took more like 20-25 minutes.


    To make the dressing, whisk together the lemon zest, lemon juice, mayonnaise, mustard, and 5 TBS olive oil.  Season with salt and pepper.


    In a large skillet or saute pan, heat the remaining 1 TBS oil over medium heat.  Add the cauliflower, spreading them out in an even layer.  Cook, stirring occasionally, until cauliflower is browned in spots, about 10-12 minutes--it partly depends on the size of your cauliflower florets, I cut min pretty small to try and ensure a shorter cooking time and as many browned spots as possible.  Add 2 TBS water, and cook and cover for 1-2 minutes, until cauliflower is just tender. Not mushy!

    This is pre-water.

    In a large bowl, combine the cauliflower, barley, beans, parsley, tarragon and dressing.


    Stir before serving to make sure the dressing is well distributed.  I thought this was delicious and highly recommend it.


    Ta-da!

    Monday, April 9, 2012

    Lemon Coleslaw

    The unseasonably mild winter that we had (as well as others) led to some unseasonably hot days back in March.  While things have returned to more normal spring temperatures, I made the most of the brief heat wave and made some summery lemon coleslaw from my Gourmet cookbook, and think it's a great one to keep on file and make in the future.

    I know I just posted about a different type of slaw (broccoli slaw--very yummy, go check it out!) recently--guess we're a slaw-venly household. Ha ha ha I should have written a dictionary.

    I doubled most of the ingredients in the recipe because the original called for 1 lb of cabbage--most cabbages I know of are much heavier than that and I didn't want a half-head of cabbage to rot in the refrigerator (at this point I know I am not always very good at using "halves" or something leftover from a recipe--it's a pet peeve of mind when a recipe calls for "half" of something, like half an onion. Oooh I could just shake my half-fists in anger!).  In the same vein, I replaced the sour cream with plain Greek yogurt because I have also learned from experience that partly used tubs of sour cream eventually grow green in my refrigerator and get tossed.


    Adapted from Gourmet


    4 tablespoons plain Greek yogurt (or any plain yogurt, strained through a cheesecloth and sieve--set it over a bowl in the fridge overnight)
    4 teaspoons low-fat mayonnaise
    1 teaspoon finely grated fresh lemon zest
    Fresh lemon juice from 1 lemon
    1 1/2 teaspoons sugar
    4 tablespoons water
    1/2 teaspoon salt
    1/4 teaspoon black pepper
    1 small head of green cabbage, thinly sliced (about 1.5 to 2 lbs--yields 6 to 8 cups)
    4 medium carrots, cut into julienne strips or coarsely grated
    3 to 4 scallions, thinly sliced diagonally (1 cup)
    1/2 cup chopped fresh flat-leaf parsley

    Serves at least 8 as a side dish

    First, make the dressing. Combine the yogurt, mayonnaise, lemon zest, lemon juice, water, salt and pepper in a bowl.  The dressing will be somewhat watery--that's okay.


    Put aside the dressing--the flavors will meld and develop.

    In the meantime, halve, core and slice your cabbage. We got our cabbage from the farmers market and whether it was because of its origins or the time of year or whatever, it was amazing. I didn't think I could call a cabbage "amazing", but it was so sweet.


    Place your sliced cabbage into a large bowl, along with the shredded/grated carrots, scallions and parsley.  Pour the dressing over and toss well to combine.


    Let sit for about 1 hour, tossing occasionally, so that the flavors become...cohesive? Anyway.  We ate ours with some pierogi.


    I highly recommend this slaw if you would like something lighter than traditional heavy-on-the-mayo slaws--this was very zingy and fresh-tasting.  Ta-da!

    Thursday, March 15, 2012

    Broccoli Slaw

    There's a recipe for broccoli slaw that I found on Smitten Kitchen a few years ago that I love to make for company--I make a big batch and we eat the leftovers as lunch or a light dinner.  I try to eat it within 1 or 2 days after making it, though, unless you like eating things "funky".

    Adapted from Smitten Kitchen

    Ingredients

    Dressing
    1/2 cup buttermilk (I usually just use the ol' lemon juice in whole milk trick because buttermilk comes in annoyingly large cartons--to make 1/2 cup buttermilk, you add 1/2 TBS lemon juice to 1/2 cup whole milk and let it sit for a few minutes, and stir before using)
    1/4 cup mayonnaise (the original recipe is for 1/3 cup--I found this to be a bit too much but I'm also not a fan of super-mayonnaise-y things so do what you like)
    2 TBS cider vinegar (or 1 TBS cider vinegar and 1 TBS lemon juice, which I did because I had a lemon and also because I like the supa tartness)
    1 TBS sugar
    1 medium or large shallot, finely chopped (about 3 TBS)
    Salt to taste--don't be shy, use at least a 1/2 tsp but you will probably want more because it's a lot of raw broccoli in this dish

    Slaw
    2 heads of broccoli
    1/2 cup sliced almonds or other nuts, toasted
    1/3 cup dried cranberries or other dried fruit
    1/2 small red onion or 2 to 3 large shallots, finely chopped (the last time I made this recipe was about a month ago and dagnabbit I'm pretty sure I still that the unused half of that pesky red onion in the refrigerator--the shallots are more $$ but at least they get used up)

    First, make the dressing. You can do this in advance to get it out of the way and to help the flavors meld.  I make dressings by putting all the ingredients into a jar, put the lid on, and shake away. So easy. I do this with cocktails as well since our cocktail shaker has a little inconvenience in that the f-in top doesn't come off but that is another story.

    Dump in the shallots, buttermilk, mayo, sugar, vinegar...blah blah you get it.


    Then, chop the living daylights out of your broccoli or run it through the food processor with the slicer attachment.  I've done both and they have the pros and cons.  Chopping by hand is more effort, and you have to make sure that you chop it pretty small so that you end up getting a decent ratio of raw broccoli:dressing.  With the food processor, the chopping part is easier but I made an even bigger mess than when I hand chop--you have to empty out that sucker pretty frequently, and in the process things get flung everywhere and you will have fuzzy green hands.  You can also use a mandoline, which I have not done because honestly I am scared of my mandoline. I took a big slice out of my fingernail once and it made me jittery.

    With the food processor, you still want to hack up the broccoli into big chunks.


    Then run them through the food processor to get this:


    And then...well let's skip a few steps where you toss the broccoli with the dressing, and season with any extra salt and pepper to taste.  Best to let it sit in the refrigerator for about an hour to get the flavors to meld.  When ready to serve, sprinkle with the almonds and cranberries.


    Ta-da!

    Wednesday, December 14, 2011

    Roasted Mushrooms

    I love mushrooms. I think they're delicious, I like the texture, and they add such a meaty component to dishes.  I know not everyone feels the same way about mushrooms, which makes me sad.  The cafeteria in my office building had roasted mushrooms every day as a selection in the buffet for about a month, which made up for the sadness.  But then the sadness returned when they stopped offering the mushrooms.  My emotions are being toyed with.

    If you do like mushrooms, here's a recipe for an easy side dish. Or, if you're like me, you'll eat the entire pound of mushrooms all by yourself as a whole meal. It happens.

    I looked at various roasted mushroom recipes and liked this one the best, and adapted it just the tiniest bit.

    Ingredients

    1 lb. mushrooms (crimini or white)
    2 TBS plus 1 tsp olive oil
    salt and fresh ground black pepper to taste
    1 TBS finely minced garlic
    1 TBS balsamic vinegar
    1 TBS finely chopped fresh thyme leaves
    1 TBS chopped fresh parsley (optional)

    Serves 4 as a side dish, or 1 if we're talking about me

    About prepping mushrooms: they say you're not supposed to rinse mushrooms because they soak up too much water, and that the best way is to wipe each f*(#$ one with a damp paper towel.  However, I was watching Jacques Pepin and he said washing mushrooms is fine, as long as you wait to do it right before you use them (otherwise the water soaks in too much, causes soft spots, something like that).  So I decided to side with Jacques on this one since it made my life easier.

    Preheat oven to 400 degrees. Crank it!

    Line a rimmed baking sheet with aluminum foil.  Trim the dried ends of the washed mushrooms and quarter them--some of then were petite enough that I just halved them, or, if extra mini petite, just left them whole.


    Toss with 2 TBS olive oil, salt and pepper, and place mushrooms onto a baking sheet.  Give them some space so they actually roast instead of just steam each other.  Roast the mushrooms for about 15 minutes, stirring things around halfway through.


    While the mushrooms are roasting, prepare the very complicated sauce.  What you do is combine the remaining 1 tsp of olive oil, balsamic, garlic, and thyme.


    Toss the sauce with the roasted mushrooms (if there is a lot of liquid in your baking sheet, pour that off before this step).


    Put the mushrooms back into the oven for another 10 minutes.

    And enjoy.  I think they say mushrooms have a lot of umami. I find them addictive. Hence a pound of them disappearing into my mouth in 10 minutes.


    Ta-da!

    Tuesday, May 17, 2011

    Two Sides: Asparagus Gremolata and Roasted Fingerling Potatoes

    So, where was I? I don't remember. I think I baked some fish. Yes, yes, I think I did. Along with that baked fish, I made some asparagus with gremolata and roasted fingerling potatoes.  For the sake of thoroughness, I present to you two perfect side dishes for your springtime meal.

    Non sequitur: I'm going the Couch to 5K program. Yeah, me. Get outta town! I've heard a lot about people getting fit lately, and combined my recent discovery that I need a hobby and that at some point, I need to actually make do on my promise to improve my cardiovascular health, I've made the plunge. I am amazing. Truly magic.

    Non-sequitur #2: once as the temperature is regularly in the 80's, that will spell death to my running because I am not going to run in hot weather.

    Asparagus with Gremolata

    • 2 lbs asparagus, trimmed (I also give the stalks a quick peel, but that's not necessary)
    • 2 TBS butter
    • 2 tsp grated lemon peel
    • 1 garlic clove, minced
    • 2 TBS fresh lemon juice
    • 1 TBS chopped parsley 

    Prep your asparagus by trimming off the tough ends.  I also ran my peeler against the stalks to remove the tough outer layer. It was a weekend and I had time--otherwise I would probably skip this step.


    Boil a large pot of salted water.  While the water is boiling, get a big bowl, fill it with ice and cold water--this will be the chilly reception your asparagus received after being cooked.

    Cook the asparagus in the boiling salted water until just crisp-tender, about 2 minutes (I prefer mine underdone instead of overdone).


    Drain or fish out asparagus with a slotted spoon and place into ice water bath.


    Let them cool for a few minutes and then drain.  If you like, this part of the recipe can be done up to a day in advance--wrap the cooked asparagus in paper towels, the plastic, and refrigerate. Let them come to room temperature for about 15 minutes before moving on with the recipe.

    Prep your lemon zest and garlic. Oh the aroma.


    Melt butter in heavy large skillet over medium-high heat. Add lemon peel and garlic and stir 30 seconds.


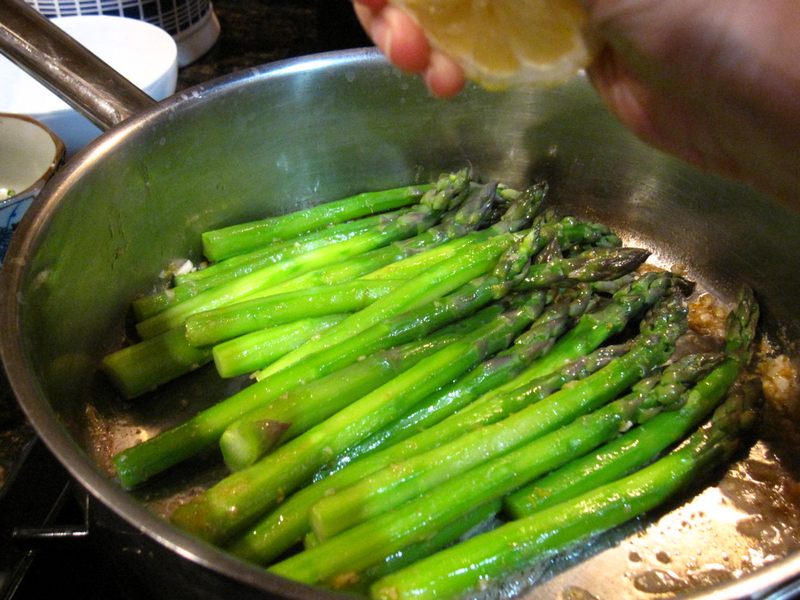
    Add asparagus and toss to coat. Sprinkle lemon juice over.


    Sauté until asparagus is heated through and coated with butter sauce, about 3 minutes. Season asparagus with salt and pepper. Transfer to platter. Sprinkle with parsley and serve.

    Hm, guess I took a picture before the sprinkling of the parsley. I am remiss.

    The "recipe" for the roasted fingerling potatoes isn't really a recipe.  Preheat oven to 400 degrees.  Clean 2 lbs of fingerling potatoes--slice the large ones in half.


    Toss potatoes with a TBS or more of olive oil, 2 chopped garlic cloves, a 1/4 tsp of red pepper flakes, and about 1/2 tsp each of salt and pepper.


    Place on baking sheet and roast until browned on the outside and cooked on the inside, about 20 minutes total.  Toss the potatoes about halfway through.  If you feel like they're browning too quickly on the outside, turn temp down to 350 degrees to give the insides of the potatoes a chance to cook. When ready to serve, sprinkle with some parsley.


    And serve it with your main course (you know, the one you made a week ago).


    Ta-da!

    Friday, March 4, 2011

    Potato Salad with Mustard Vinaigrette

    [sung to the tune of Maria Maria from West Side Story]

    Potaaatoes! 
    Potatoes potatoes 
    I looove you! 
    With butter or sour creeeaam, 
    or just a bit of cheese, 
    oh pleeease!!

    I'm a musical genius.  Says who, you may ask? ME!!

    I originally made this potato salad for New Year's dinner and loved it so much, I decided that it would be a great main course all by itself.  Says who, you may ask?  ME!!

    Adapted from Epicurious

    Ingredients
    • 2 lb small (1- to 1 1/2-inch) potatoes, preferably new potatoes (this just means small taters)
    • 1 1/2 teaspoons salt
    • 3 tablespoons finely chopped shallots (about 2)
    • 1/2 tablespoon Dijon mustard
    • 1 tablespoon whole-grain mustard
    • 1 tablespoon white-wine vinegar, or to taste
    • 1/2 teaspoon black pepper
    • 3 tablespoons olive oil
    • 2 tablespoons chopped fresh flat-leaf parsley
    The original recipe has you cook the potatoes whole, then drain and cut, but I missed that part and started hacking into my potatoes willy nilly from the get-go.

    Then I realized that it turned out for the better because if I had cooked them whole I would have to wait until they cooled down to cut them.  That kind of process + my impatience = ouchy singed fingertips.

    Anyway, wash and cut your potatoes into about 1-inch pieces. 


    Place potatoes in a pot and cover with water so that the water is about 1 inch above the potatoes.  Add in 1 tsp salt (which I forgot to do and towards the end, realizing in a panic that I was going to have unflavored potatoes, threw in what I thought was a teaspoon of salt which was actually a tablespoon and then ensued all kinds of hijinks involving siphoning off salty water and replacing it with regular water to cut down on saltiness why am I telling you this).

    Heat over high heat until boiling, then lower heat and simmer until tender.  The original recipe said to simmer for 10 minutes, but mine took about 20 minutes (which may be in part due to above hijinks).

    While the potatoes are cooking, make your vinaigrette.  Combine the chopped shallot, mustards, vinegar, pepper, and remaining 1/2 tsp salt in a large bowl (this is the bowl that you will add the potatoes to, so get a big one).


    Gradually whisk in oil.

    It's an action shot! An action shot!

    When the potatoes are done, drain them and then add to the vinaigrette.

    Sprinkle with chopped parsley and you're done!


    I don't know if this can really be considered a nutritional main course, but I really don't care. Oh wait a second I remember I served it along roasted brussels sprouts.  Hm, I guess I *do* care about having a balanced diet.

    Creamy, toothsome potato, I love thee vewy vewy much. Ta-da!

    Wednesday, February 23, 2011

    Spicy Hoisin Chicken and Braised Celery

    As you may have noticed, yesterday wasn't even Monday but I still labeled yesterday's post as "Monday". It was very kind of all of you to refrain from pointing it out, lest it burst my hazy semi-comatose state and kill me.  I'm all off-kilter.

    I'm back, with a little coffee.

    I've had all kinds of hankering for anything with soy sauce in it.  This spicy hoisin chicken dish hit the spot, and was easy and hands-down good.  

    The original recipe called for chicken thighs with the skin, but I used skinless thighs instead and adjusted the cooking temp/time accordingly.  Also, next time I might cut down on the amount of hoisin and up the soy sauce, since I'd like to try making it a wee less sweet.

    Adapted from Epicurious.

    Ingredients
    • 1/2 cup hoisin sauce (I might try 1/4 to 1/3 cup next time)
    • 1 teaspoon finely grated peeled fresh ginger
    • 4 garlic cloves, minced
    • 1/2 teaspoon dried hot red pepper flakes
    • 1/2 teaspoon Asian sesame oil
    • 1 tablespoon soy sauce
    • 1 tablespoon rice vinegar
    • 8 skinless chicken thighs with bones
    Serves 8.

    Heat oven to 400 degrees.  In a medium bowl, mix together the first 7 ingredients.


    Place chicken thighs in large baking dish (this is a 9 x 13 dish) and pour sauce over chicken.  Turn to coat well.  By the way if you want easier cleanup later, you can line the dish with foil.  Or, if you want to stand in solidarity with me and do your share of soaking/scrubbing, and soaking/scrubbing, then some more soaking/scrubbing, please feel free.


    You can either cook the chicken at this point, or you can cover and marinate for an hour (I didn't refrigerate the chicken during this hour because I wanted the flavors to infuse into the chicken as quickly as possible, but if that's some big health no-no, then don't listen to me.  You can also, of course, place the marinating chicken into the refrigerator).

    Bake chicken for about 35 minutes.

    While the chicken was baking, I made a side of braised celery.  I mentioned this dish in a previous post without going through the full recipe, which some of you lamented about.  Well, here it is, and you'll see how basic it is.

    Ingredients
    • Two bunches of celery hearts
    • 2-3 tsp vegetable oil (or some other neutral oil) 
    • pinch of five spice powder (optional) 
    • 1/2 to 1 cup chicken or veggie broth (or water)
    • 2-3 tsp of soy sauce
    Trim the celery hearts and cut crosswise into 2-inch pieces.  Then cut each piece lengthwise into 3 to 4 strips.  Or, if you're smarter than me, you'll do the lengthwise cutting first.

    I love cutting celery. I love that crunching/ripping noise the knife makes when it breaks through all the threads.  I made that sound kinda violent. Hm.

    Heat oil in wide saute pan or skillet over medium heat.  Add in the celery and enough broth to come about halfway up the celery.  This was extremely approximate.


    Add in five spice powder, if using.  Cover and braise for about 5-10 minutes--keep checking to see when it gets to your desired texture.

    When the celery is done, drain off a bit of the liquid (I put the cover on off-center by a smidgen and pour over sink) and add in the soy sauce.


    You're done with the celery.

    Take out the chicken...


    ...and serve with the celery and some rice.


    Ta-da!

    I would totally make this again, and perhaps cut down on the hoisin a little and add more soy sauce or a touch of black bean sauce.

    Monday, December 13, 2010

    Pork Chops (Burnt), Carrots and Brussels Sprouts

    If that doesn't sound like a square American meal, I don't know what is. Although no potatoes.

    As simple as this meal sounds, I managed to mess it up anyway, by burning one side of the pork chops, and creating a permanent carbon fossil on one of my baking sheets. 

    I'm usually not a big fan of cooked carrots (as in, on their own--I'll put them in other things, but I don't typically eat them on their own). Lifeless, limp, flavorless things. But I'm guessing that's because I've only had lifeless, limp, flavorless cooked carrots. Whilst at the farmers' market, I spotted some lovely-looking carrots and decided to give it a go. 

    I had a hankering to make them super sweet, maybe a little tangy.  Most of the recipes that I searched for using the clever and totally non-generic phrase of "sweet carrots" in Epicurious turned up recipes using baby carrots, but you can do this with any carrots.

    Adapted from Epicurious
    • 1 1/2 pounds carrots
    • 2 tablespoons extra-virgin olive oil plus additional for drizzling
    • 1 teaspoon (packed) finely grated orange peel
    • 1/3 cup fresh orange juice
    • 2 TBS honey
    Preheat oven to 400 degrees.  Peel, trim and slice carrots into about 1/3" to 1/2" inch coins (or if you're using baby carros, just leave 'em).


    When I was trying to take pictures while making this dish, everything took on an orange tint. I felt like I was drowning in Gatorade.

    Place the carrots on a rimmed baking sheet. Sprinkle lemon zest over them, along with olive oil, salt and pepper.


    Naked orange alert!


    Toss carrots to coat well with the seasonings.  Pour the orange juice over the carrots.


    Cover tightly with foil.


    Carefully place baking sheet in oven (remember there is a little liquid sloshing around in there).  Roast until crisp-tender--the original recipe says 10 minutes for baby carrots, but I was worried that would overcook my coins so I did about 7.

    Raise temperature to 450 degrees.  Carefully remove foil and drizzle honey over carrots. 

      
    Place back into oven, uncovered, for about 10 minutes, until some of the carrots are browned a little.  Or, in my case, try to wait until they brown, give up due to alarming amount of carbon buildup resulting from burnt orange juice and honey, and remove baking sheet in a hurry.

    I took a really awful final picture which you'll see at the end of the post.  Regardless, these were delicious. Just enough sweet and just enough tang from the orange juice. Yum.

    The carrots were the only component that really require me to tell you a "recipe".  So the other stuff I will breeze through. 

    Now, my little brussels sprouts, I come to hack you, roast you and eat you.

    Heat oven to 350 degrees.  Trim off ends and remove any sad-looking or gross leaves.  I halved them unless they were really small, in which case I left them whole.


    Place on baking sheet (or two, depending on how many you have) without crowding, and toss with plenty of olive oil, salt and pepper.  Sprinkle about 1/3 cup water over the brussels sprouts (the idea is to let them cook a little gently first, and then when the water evaporates, they will brown on the outside).


    Roast for about 7 minutes minutes, take a peek, toss, and roast some more until nice and brown, about another 7 minutes (the time will depend on the size of your brussels sprouts).

    For da pork chops.  I had a hankering for meat, which we don't eat so much of at home anymore.  So I bought meat at the farmers' market.  Two for $17. Bargain. Right? No! Gah! In the words of Ina Garten, I forked over the money, telling myself it was a "special occasion" (don't ask me what the special occasion was, though, besides watching Glee). It reminded me why eating happy meat on a regular basis is not in the cards for us.  

    Pat chops dry with paper towel.  Sprinkle one side with salt, pepper, and ground mustard.


    Heat 2 tsp olive oil in large skillet.  When oil is really hot but not smoking, place in the pork chops, seasoned side down.  Season the other side, trying to avoid hot oil splatters attacking you.

    Wander off and forget about the pork chops.

    Come back and realize that you've let the pork chops "brown" a leeettle too long. Flip over.  (Ideally, you'd put the pork chops in, and leave them alone until they develop the color/crust you want, then flip--and I guess if you like your pork chops "heartily browned" on one side, you can do what I actually did).


    Hehe. No, not funny. So sad. I think I see dollar signs wafting off in the smoke.

    Lower heat big time and cook gently for a few minutes.  I generally like my pork a little pink the middle, but yeah with the whole first side fiasco I kinda overshot that.


    Really bad picture. Clearly I already started eating and smeared my food around the plate before deciding to grace you with this photo.

    Luckily the pork chop was not too dry.  It definitely would have sucked as leftovers (trust me it could not take any more cooking), but it was actually really good--not thanks to me but to the quality of the pork and the seasonings--so I ate the whole thing in one sitting. And yeah the veggies were good too, not that you can tell in these pictures.

    Maybe this is also a post demonstrating the common experience of bloggers to start hot and heavy with pics, and then devolve into lameness.

    ta-da.